
Electrical Troubleshooting, PLC Troubleshooting training.
- Home >
- vocational-training >
- electrical >
- electrical troubleshooting plc troubleshooting
The TSTrainer Electrical & PLC Troubleshooting Certificate Course
The electrical troubleshooting examples in this TSTrainer certificate course will help sharpen your electrical installation testing skills. It includes introductory PLC troubleshooting training modules. The electrical problems start with basic electrical wiring and move up to PLC examples. The TSTrainer assists industrial electrical contractors, maintenance technicians, and other learners with systematic troubleshooting skills. This course uses NEMA and IEC electrical standards.
The skills of the competent technician must include an organized means of troubleshooting and performing root cause analysis. This interactive electrical troubleshooting training certificate course will introduce the trainee to a proven troubleshooting system. Upon completion, the technician will display skills in methodical electrical troubleshooting and PLC fault-finding techniques. The learner gains experience by completing the increasingly complex electrical troubleshooting simulations.

Click on pictures to see a larger screenshot with more details.
Prod #: KT-900-TSTrainer (10+ hours, New Version 5.3)
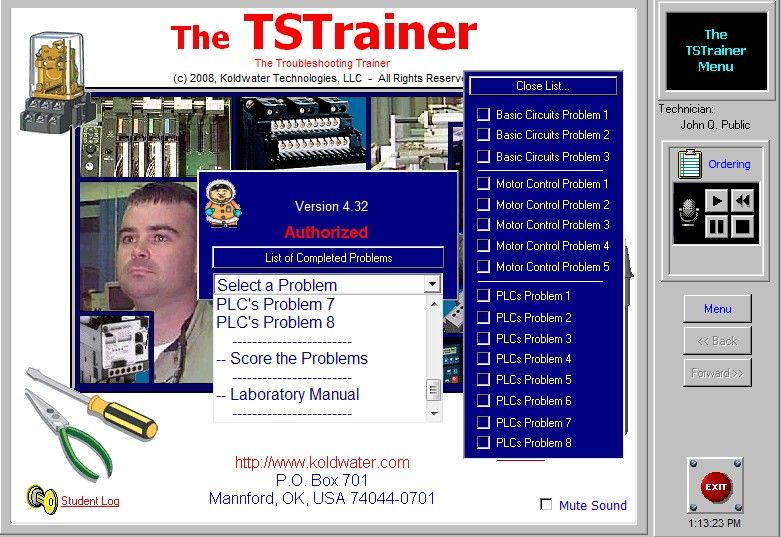
The TSTrainer certificate course includes training modules on ...
- Electrical Troubleshooting Introduction
- 3 Basic Electrical Wiring Simulated Faults
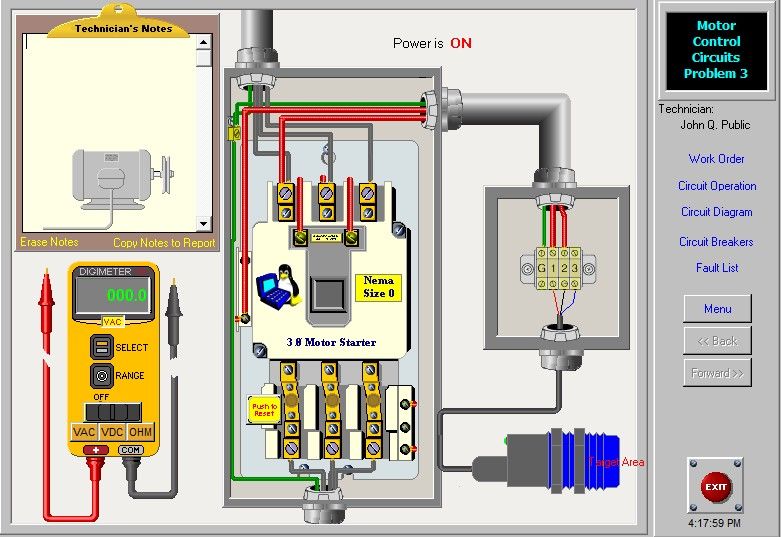
- 5 Electrical Motor Control Faults
- 8 PLC Troubleshooting Faults
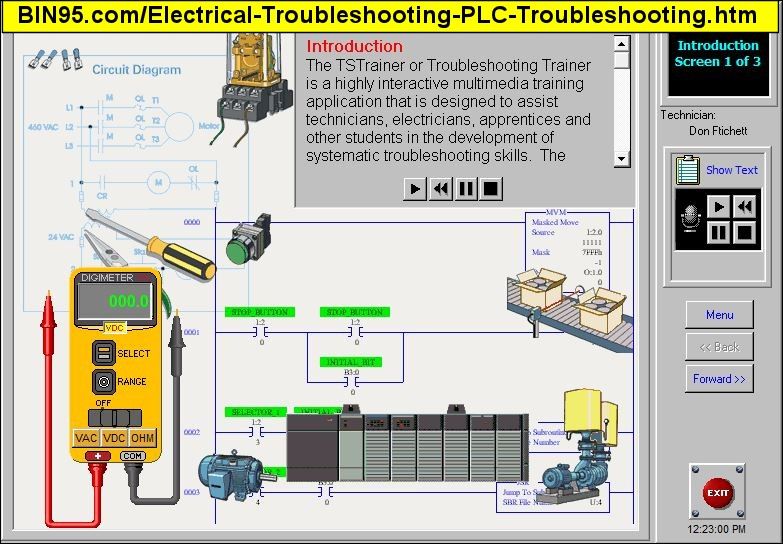
The TSTrainer electrical troubleshooting course is excellent for individuals just starting and wanting to learn independently. The first training module introduces electrical troubleshooting with text and audio narration. It also includes instructions on how to use the TSTrainer.
The troubleshooting trainer is a highly interactive multimedia training application designed to assist technicians, electricians, apprentices, and other students develop systematic troubleshooting skills. The emphasis of the training is not on shot-gun type troubleshooting but on root cause analysis. Ladder diagram examples and an explanation of proper circuit operation accompany each PLC and electrical problem.

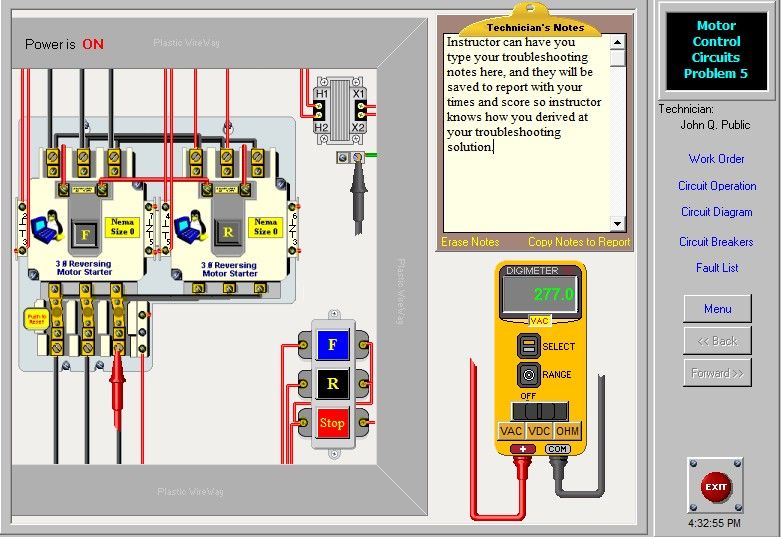
1 of 8 Electrical Troubleshooting Simulations
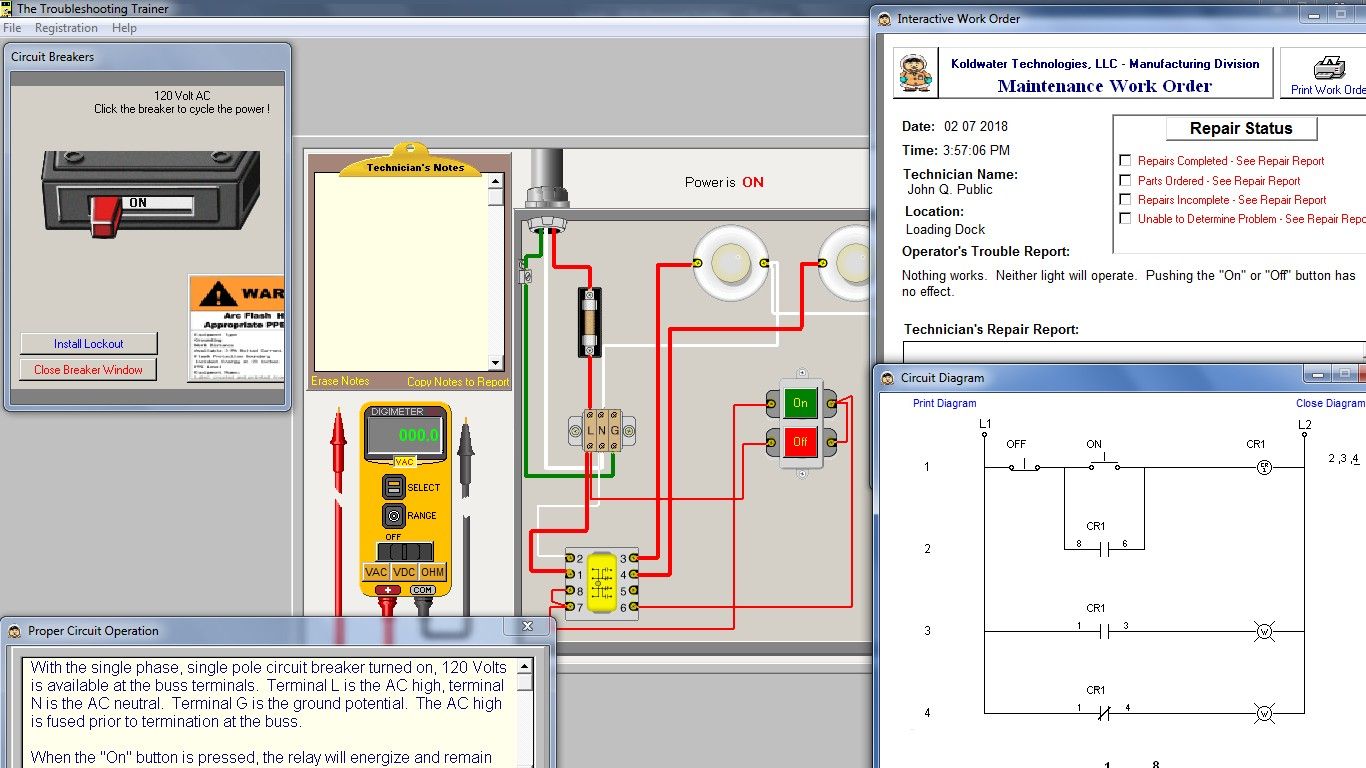
Learning Electrical Troubleshooting:
The user will be able to use a multimeter to take measurements of circuit potential. Also available is the ability to power down the circuit and lock out-tag out the circuit breaker when repairing. However, the troubleshooting problems within this application are limited to troubleshooting live circuits only.

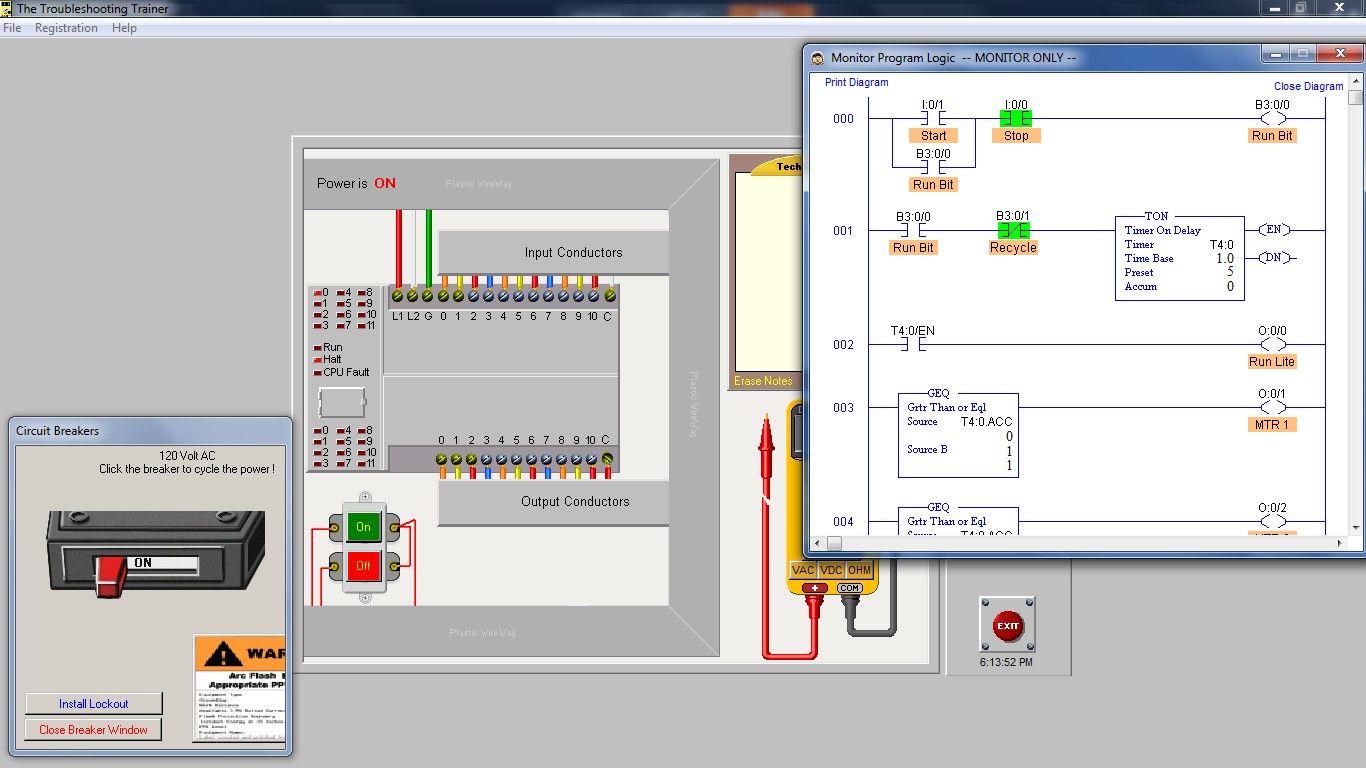
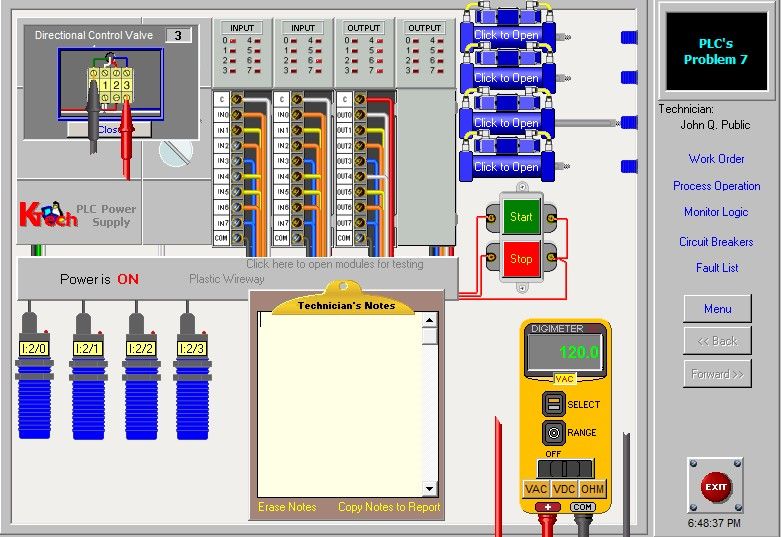
1 of 8 PLC Troubleshooting Simulations
Learning PLC Troubleshooting:
On one or more of the PLC troubleshooting exercises, the user may not be able to go online with the PLC as that exercise aims to teach/test the ability to troubleshoot without access to the ladder logic program. Such is the real world sometimes. Additional features of the PLC troubleshooting faults are the ability to open some solenoid wiring junction boxes to test at that point with virtual VOM (Volt Ohm Meter). Also, PLC can be switched from run mode to halt.
Included: A 32-page printable electrical troubleshooting PDF Lab Manual that provides more introduction to troubleshooting control circuits.
Upon successful completion of all electrical and PLC troubleshooting faults, the student or instructor can print a certificate of completion.
Testimonial:
Ty Montgomery - Maintenance Technician - " The company that I work for recently bought your TSTrainer. They allowed all of the maintenance guys to use it. It has really helped to hone my trouble shooting ability.
Within 24 hours of placing the order, you will receive an email with a download link, activation information, or tracking information if the order is shipped.
Order a Single Student License above or unlimited students/installs per physical site with the Site License.
For unlimited physical site licenses (locations), please Request a Quote for the Enterprise License.
We used the audio narrations from the course section on a simple troubleshooting process to create the video below. The video's end is a quick tour of the electrical and PLC troubleshooting course software.
We often create extra supplementary free learning material for our courses and place them on this site and our YouTube channel so the learner can learn even more.

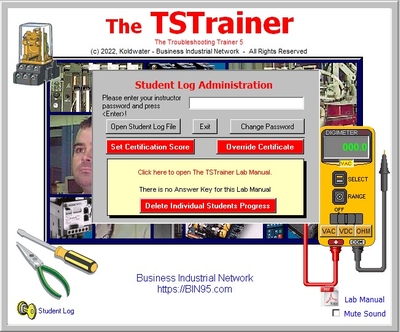
Built-in Troubleshooting Test and Course Certificate
Note: Before answering an electrical troubleshooting fault question and clicking the repair button in the course, be sure to Lock Out - Tag Out First!
You want to earn points in the test for electric repair safety!
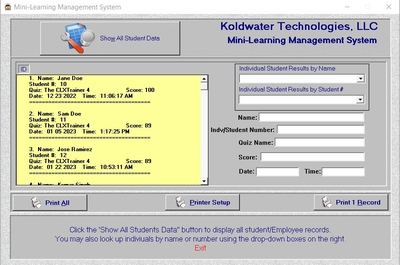
Built into the Site and Enterprise-licensed versions of this course software is a mini-LMS.
With the site licenses, students can print a certificate of completion, saving the student's score to a "student log file" accessible by Site and Enterprise license holders. That feature and others make the site license purchasing option perfect for Technical Schools, Community Colleges, Universities, Apprenticeship Programs, and company training departments.
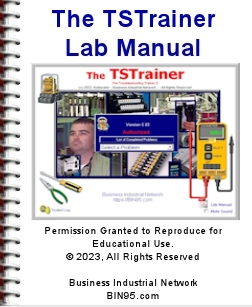
Included with the course is an Electrical & PLC PDF Laboratory Manual. It consists of optional guided explorations of the circuits and asks to describe observations. The manual starts with a section explaining how the TSTrainer software works. The content in the lab manual is optional for students/employees and is not needed to take and pass this course. No answer key is available, as there are no questions in this lab manual.
This lab manual's primary purpose is to serve as an additional tool for the instructor to help students understand more and support the instructor in evaluating the student's understanding better. The individual purchasing this course can also benefit by studying the lab manual independently. Individuals taking this course should follow the recommended learning path at the bottom of this page and take our Motor Controls and PLC Basics course first.
The 28-page Lab Manual PDF is an excellent instructor aid.
Within 24 hours of placing the order, you will receive an email with a download link, activation information, or tracking information if the order is shipped.
Order a Single Student License above or unlimited students/installs per physical site with the Site License.
For unlimited physical site licenses (locations), please Request a Quote for the Enterprise License.
License Types:
Student License - 1 student/learner may take the course.
Site License - Unlimited students/installs at a single site [physical location].
Enterprise License - Unlimited Site Licenses/locations for schools or companies. (Request Quote)
While simulations through multimedia applications such as the TSTrainer are excellent for initial training in electrical and PLC fault-finding techniques, nothing can replace actual hands-on practice with real equipment. The circuits simulated in this software would be an excellent starting point for actual practice. As an instructor, consider constructing circuits to reinforce the concepts learned here.